Leaderboard
Popular Content
Showing content with the highest reputation on 12/24/2019 in all areas
-

Instructions
Sara reacted to DPI Wizard for a topic
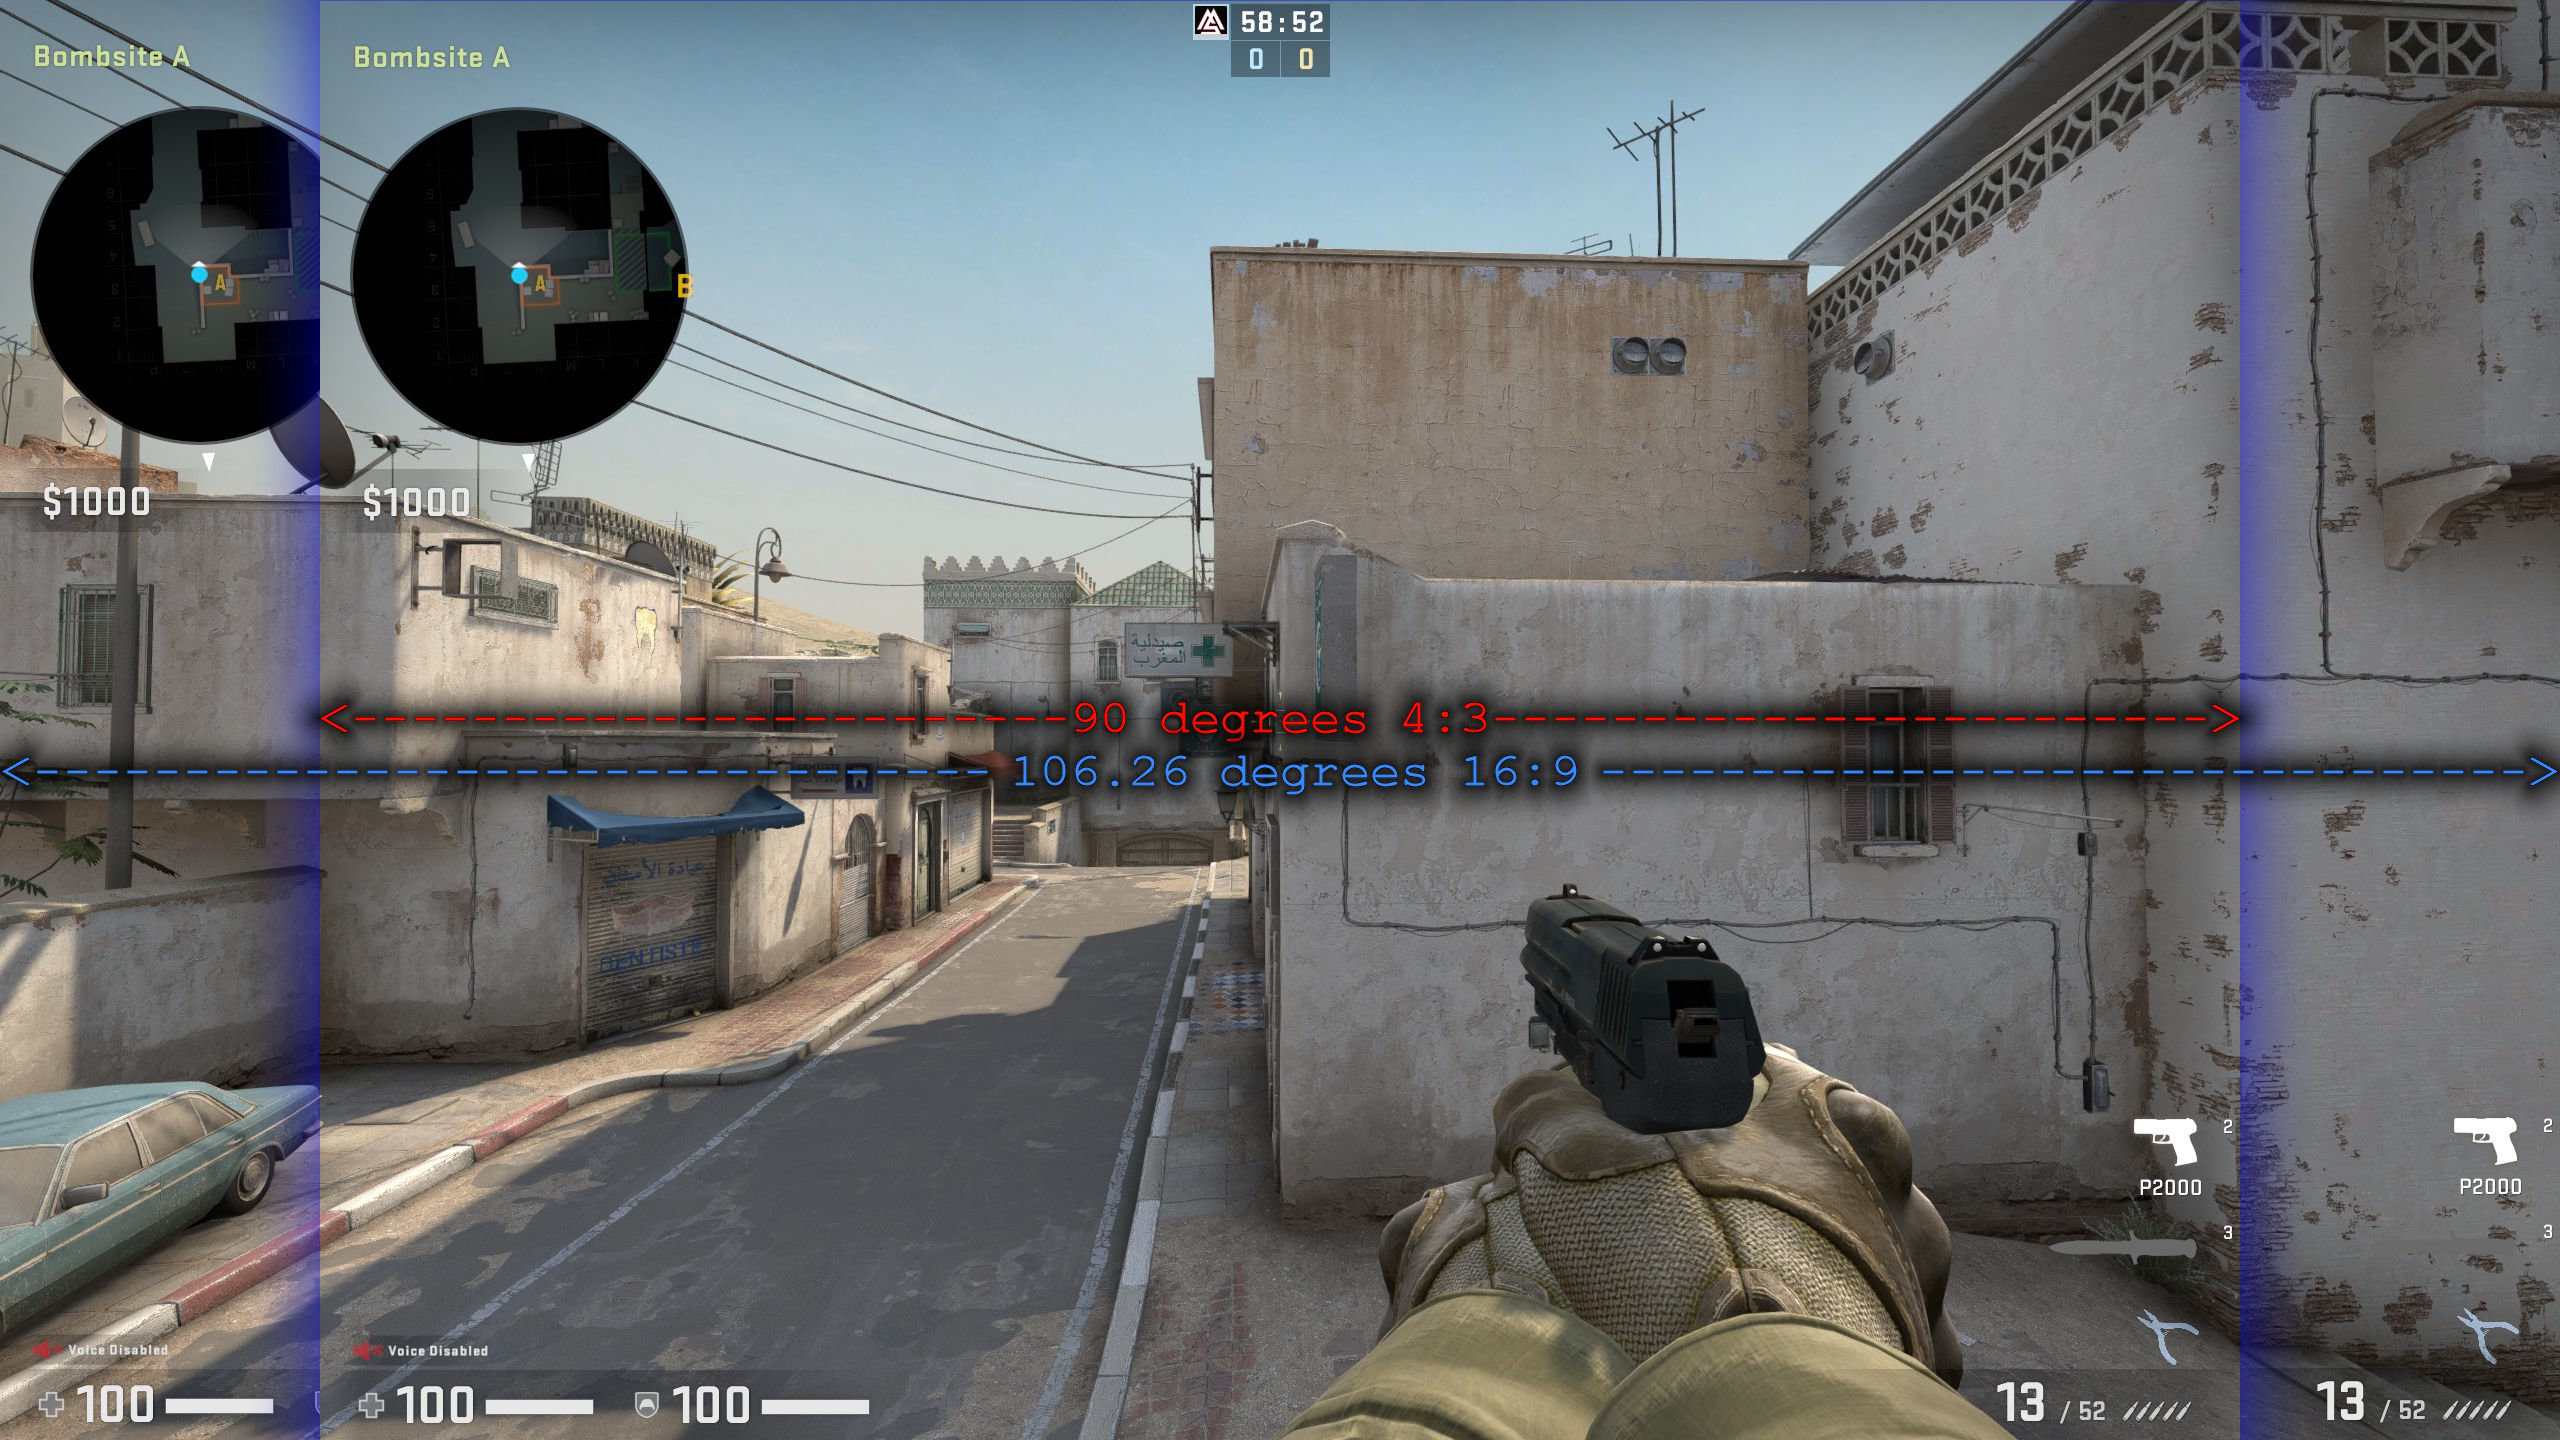
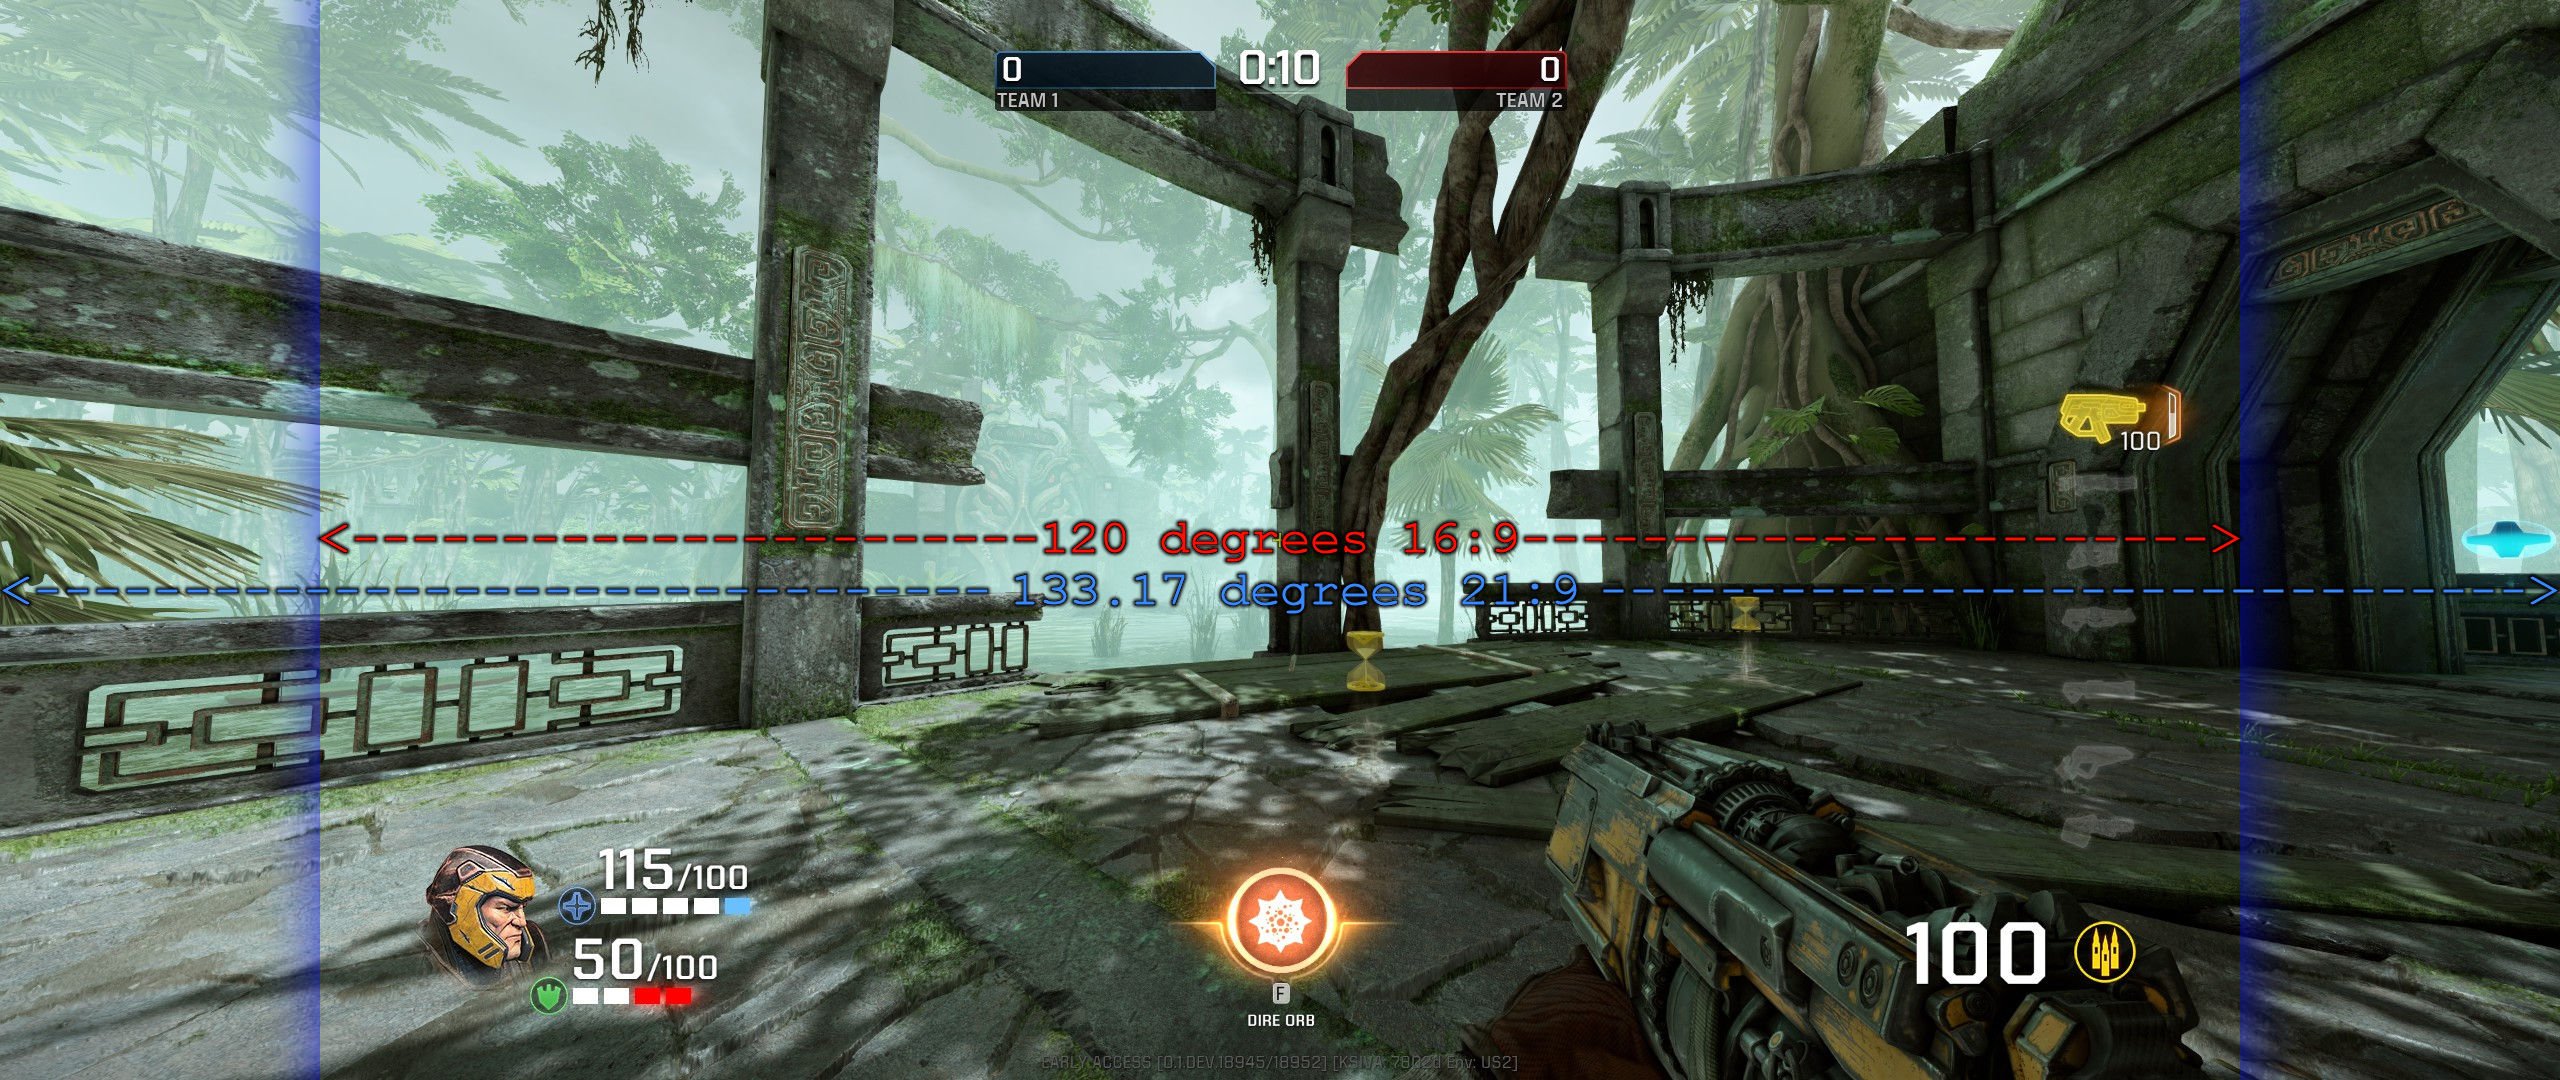
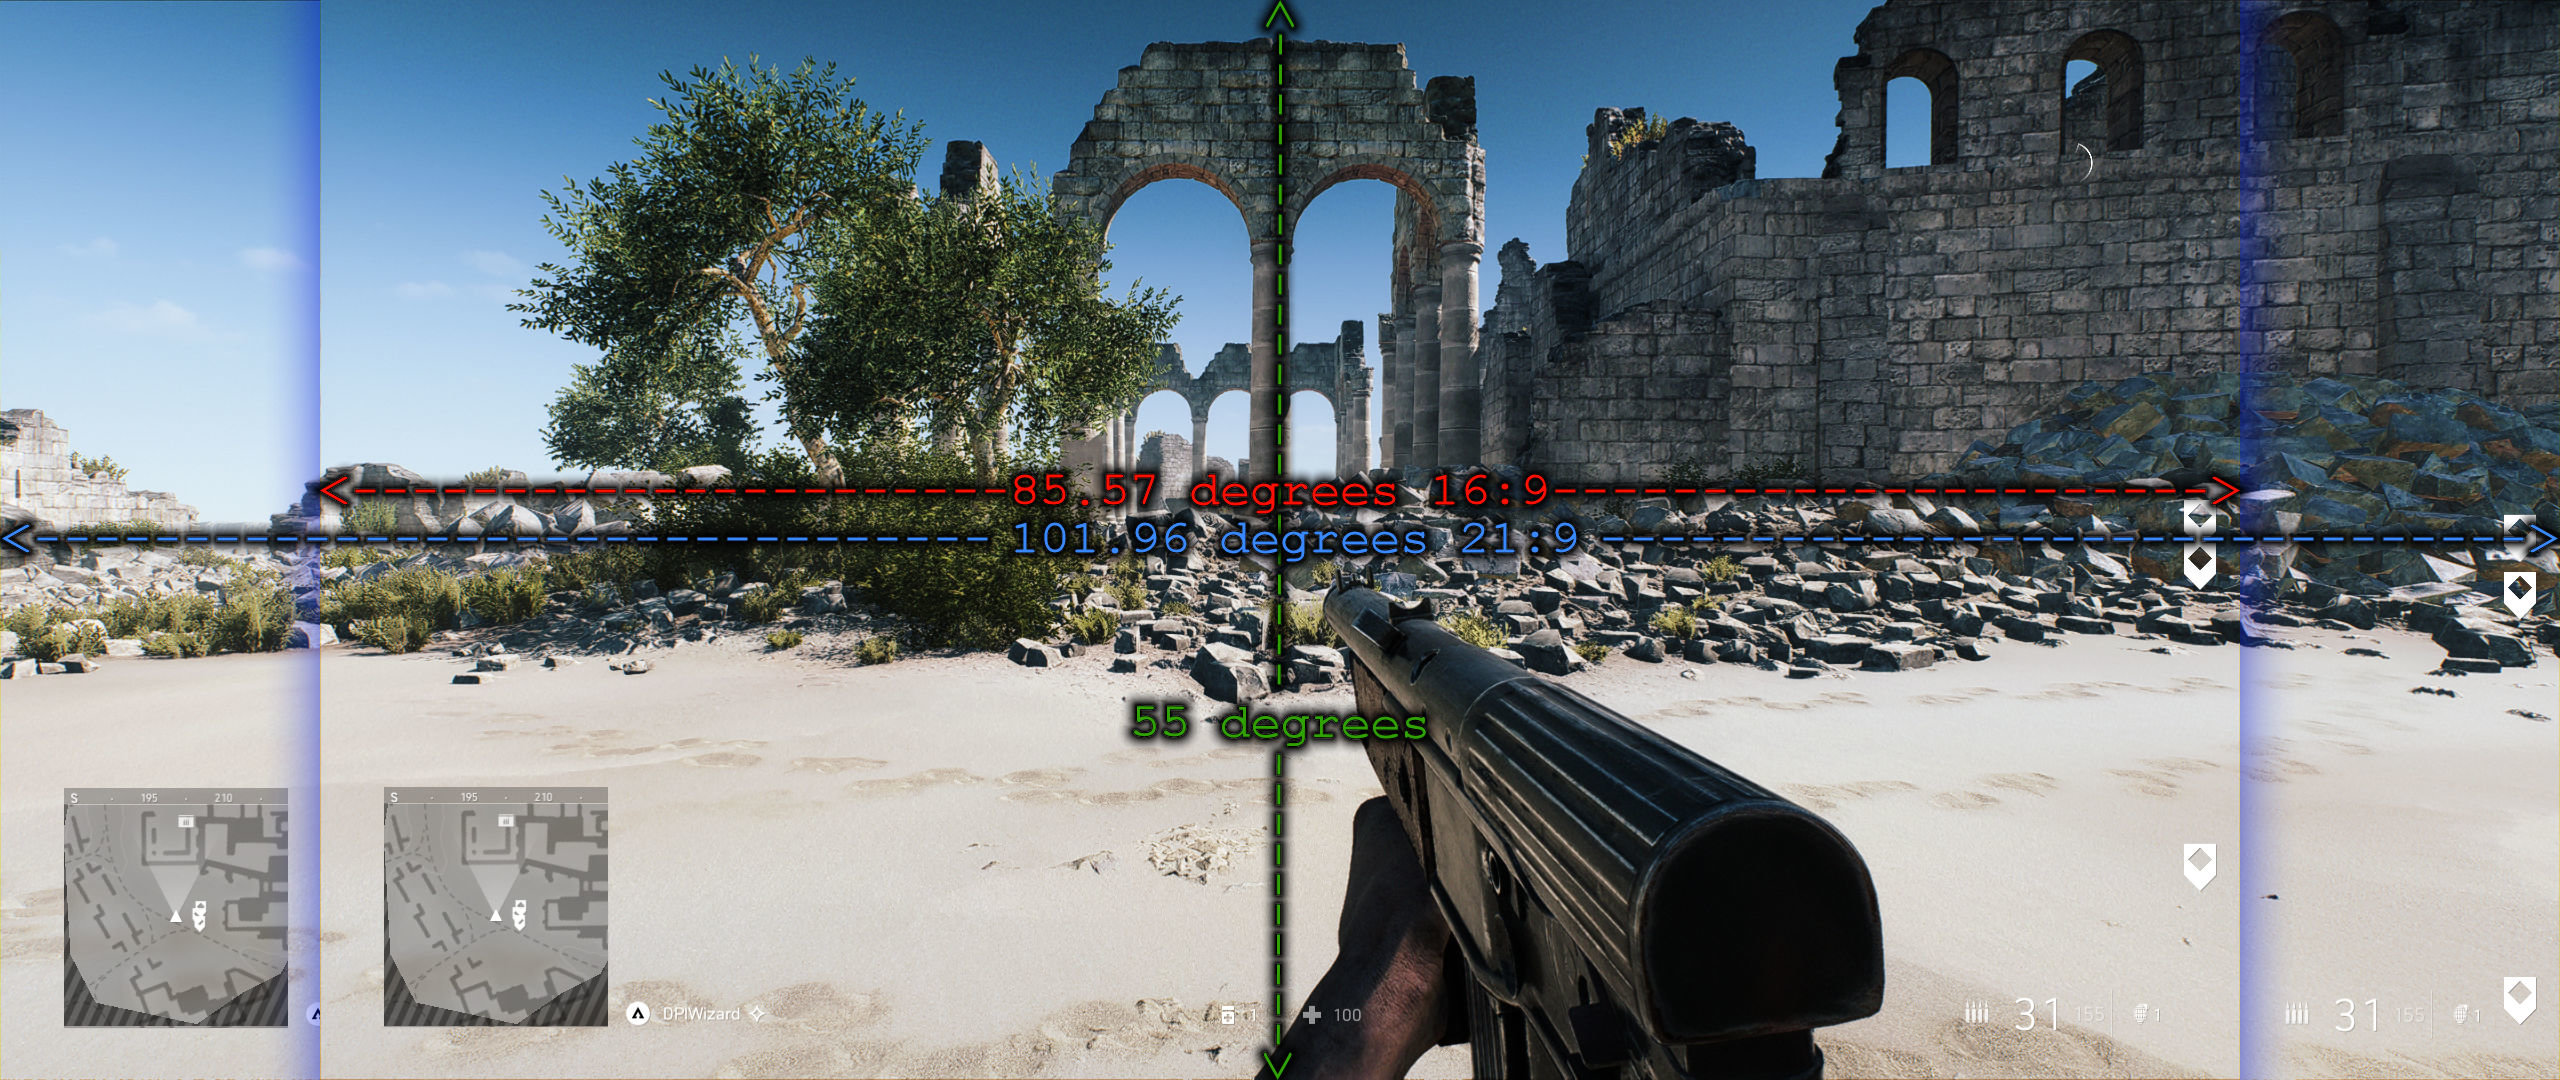
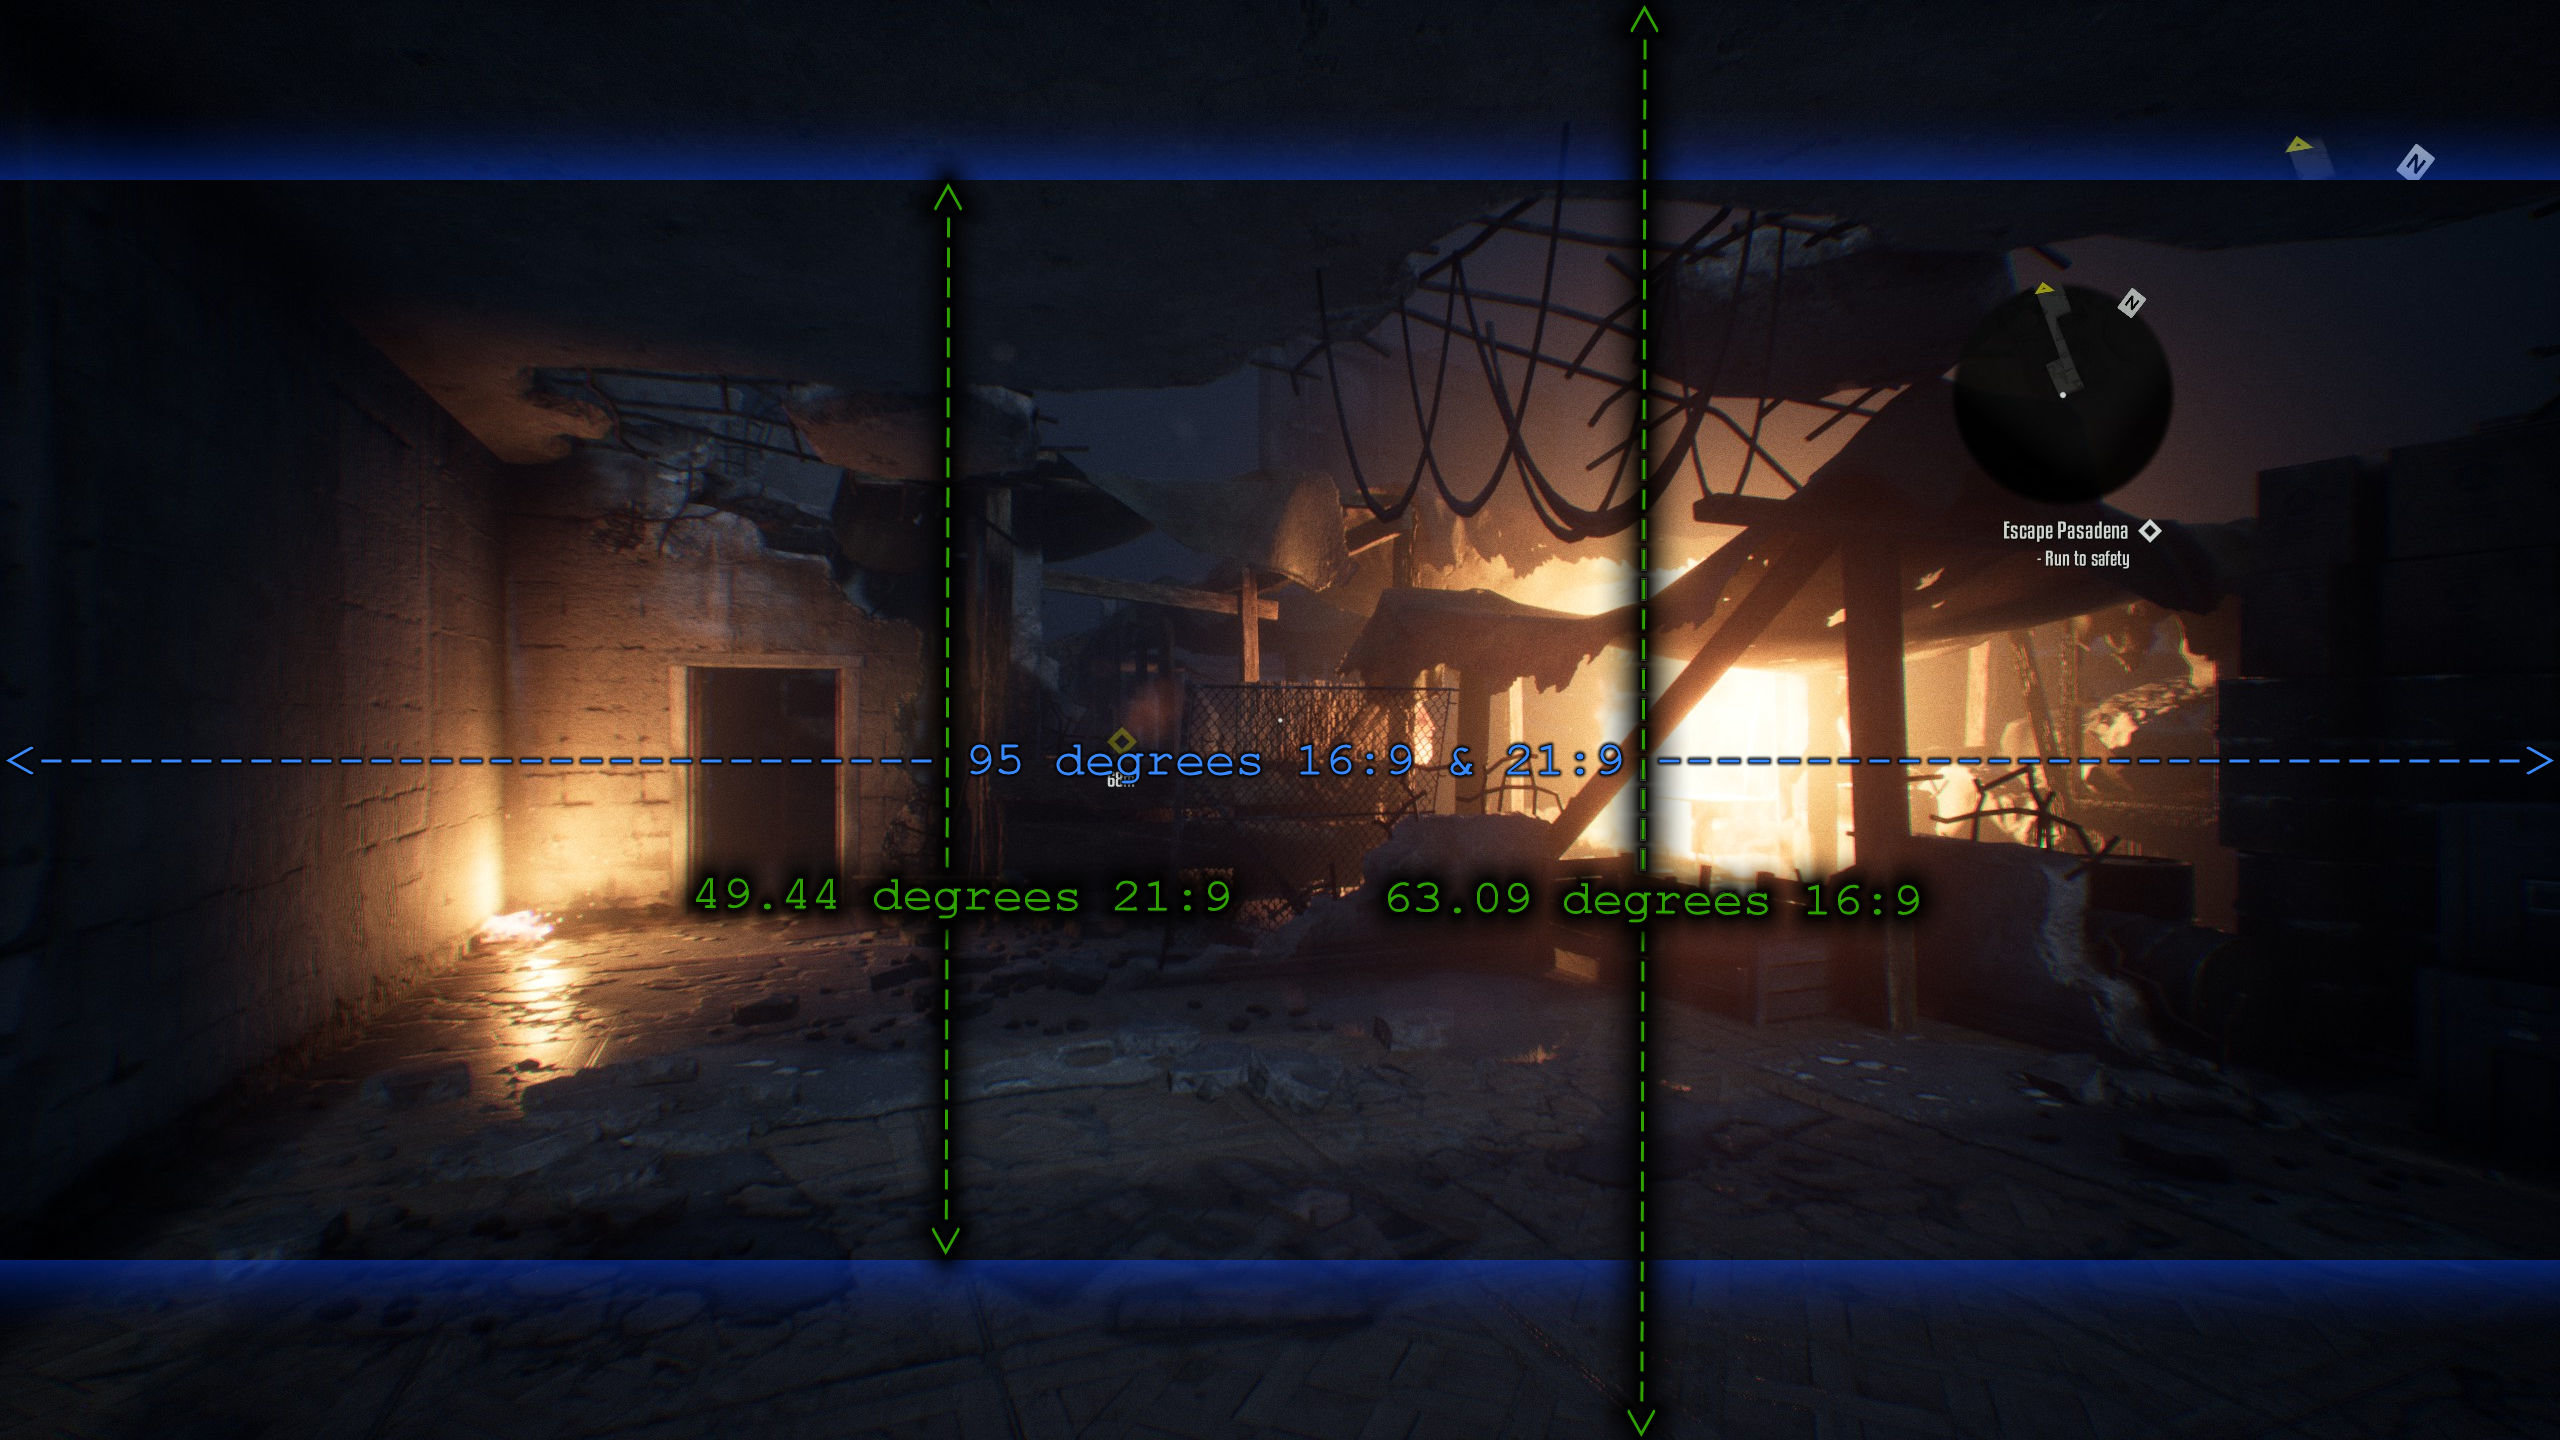
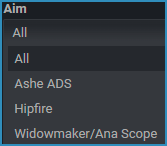
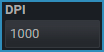
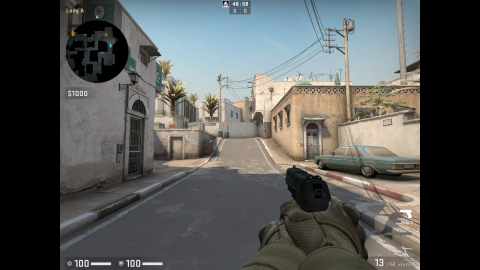
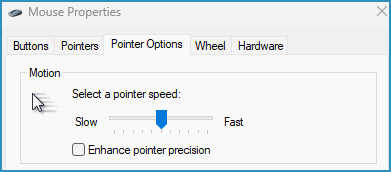
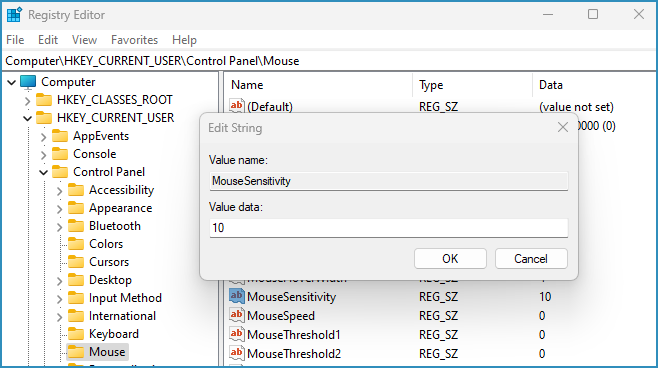
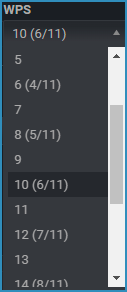
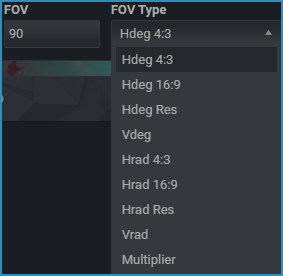
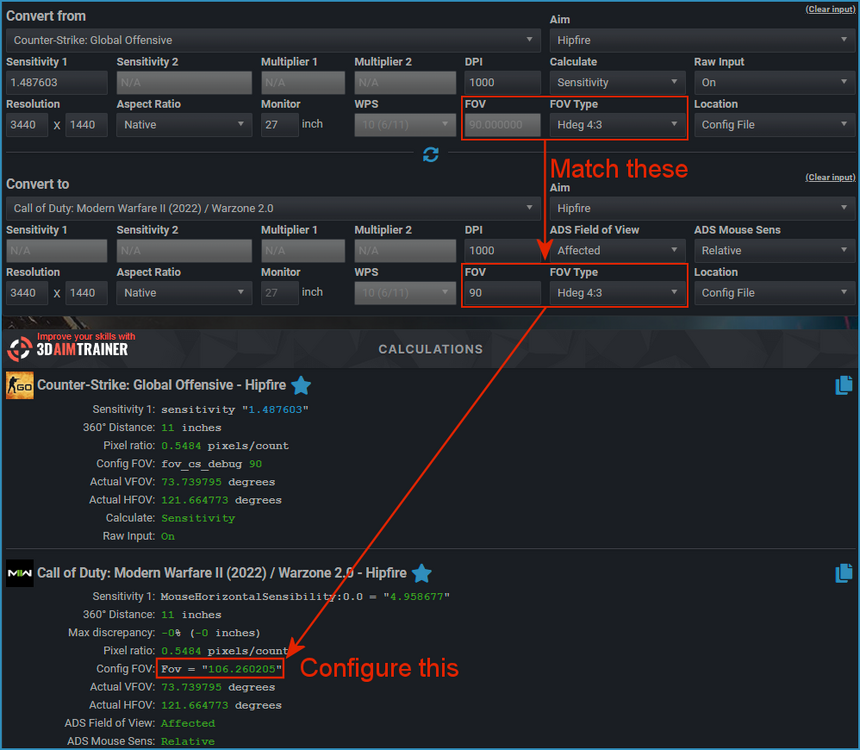
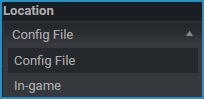
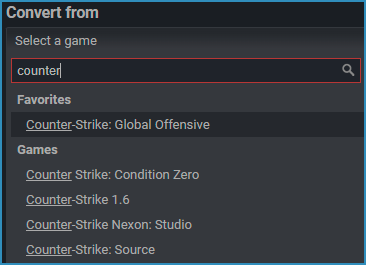
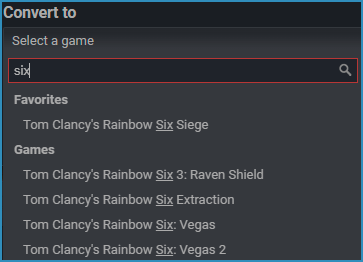
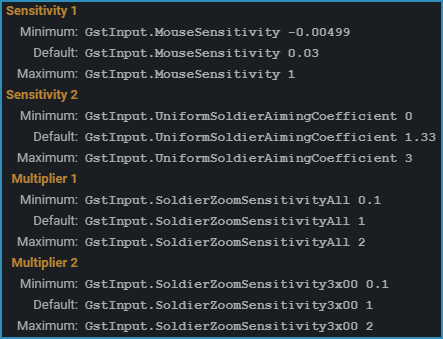
Input Convert from Here you select the game you want to convert from. By default, the list is sorted alphabetically, but you can choose to group the games by engine based on your "Sort By" selection. If you are logged in, you can also mark games as favorites to have them appear at the top of the list. You can search through the list using the search bar, and the search term will match any part of the game name. Convert to Select what game you want to convert to here. This list behaves exactly like the "Convert from" list. Aim Select the aim you want to convert sensitivity from or to. Some games only have one aim (such as Hipfire or Look), while others have several different aims like ADS, scopes or vehicles. Usually, each aim has its own sensitivity setting. However, note that some aims may share settings with each other, meaning you have to choose one of them to use for your calculation. For games with multiple sensitivity settings (such as hipfire, ADS, scope, etc.), an "All" option will be available in the aim selection. Choosing this option will instantly calculate all the sensitivity settings for the game without going through each aim option and making sure all settings match. For games that have scope sensitivity but lack granularity (such as separate sensitivity for each scope), the corresponding aim/scope for the calculated sensitivity will be shown in parenthesis after the sensitivity value in the output when using the "All" conversion. This means you have to choose which one to use. Sensitivity 1, Sensitivity 2, Multiplier 1, Multiplier 2 These fields will be enabled or disabled depending on the aim you select. You must enter a number into all enabled fields. These numbers are either the default values for the game, or sensitivity settings you already have set in the game. Default values will be automatically loaded as placeholder values. The output and game info will show you what sensitivity setting go where, and what the valid range is. The default values will in most cases work fine, but make sure that your game configuration matches! If a field is disabled it is either not in use, or the value for this field will be calculated and is shown in the output. For instance if you convert from the 3.00X Zoom Sensitivity aim in Battlefield 2042, all fields will be enabled. This means that you must find all the values listed in the output, and enter them into their respective field. In this example: Sensitivity 1 is the GstInput.MouseSensitivity value, and have a valid range of -0.0049 to 1. Sensitivity 2 is the GstInput.UniformSoldierAimingCoefficient value, and have a valid range of 0 to 3. Multiplier 1 is the GstInput.SoldierZoomSensitivityAll value, and have a valid range of 0.1 to 2. Multiplier 2 is the GstInput.SoldierZoomSensitivity3x00 value, and have a valid range of 0.1 to 2. When there's no value in the input field for a sensitivity, the output will show you what parameter it expects: This means a necessary value is missing, and you must enter it in the Sensitivity 1 field. The red numbers show you the valid range for the sensitivity, in this case going from -0.0049 to 1. If you enter a number beyond this range, the output will tell you which sensitivity is out of range, and the maximum or minimum value: You must adjust the sensitivity accordingly. All these values can be found in the config file listed in the game info. In some cases the value is not added to the config file unless it is changed in-game, if so you can use the default value or change it in-game to reveal the value in the config file. The Multiplier 2 field will change to a distance field if you select to use Distance as the conversion source. Enter the distance you want to calculate sensitivity for here, and if any other sensitivity or multiplier fields are enabled you must enter the required values. DPI DPI (Dots Per Inch) is a measure of the sensitivity of your mouse, indicating how many dots (or pixels) your cursor will move on the screen for each inch you move your mouse physically. Although the correct term is technically CPI (Counts Per Inch), the term DPI is more commonly used by both consumers and manufacturers. Some mice only have one preset DPI setting, some can change between a few preset values and others have drivers that let you set exactly the value you want. Enter the DPI of your mouse into this field. The entered value for the input game will be duplicated as a placeholder value for the output game so you don't have to fill it out twice if you use the same DPI. If you want to change DPI for the output game, simply overwrite the placeholder value. If you do not know what your DPI is, use the DPI Analyzer to measure it. Special Option 1 and Special Option 2 These two field will dynamically change depending on the game and location you select. These options are important to the sensitivity calculations, so pay attention to them. They can be options like settings in the game that affect the sensitivity, different game modes or different version of the game. Resolution Resolution is an important factor when calculating FOV, a key component of sensitivity calculations. In some games, sensitivity is even directly influenced by resolution. If possible, the calculator will detect and pre-fill your current desktop resolution as a placeholder. If you are not using a Windows or MacOS device, the calculator will automatically use a resolution of 1920x1080. If the placeholder resolution is incorrect, enter the resolution you use in the game. Aspect Ratio To simplify input for those who play with custom aspect ratio, the calculator has native support for configuring this. This means that you enter your monitor's native resolution, then select the aspect ratio you use. Stretched is the aspect ratio stretched out to the entire resolution of your monitor. Black bars is either black bars on the sides, or letterbox i.e. black bars on top and bottom. Important: Changing aspect ratio does not necessarily change anything in your calculation! 360 distance will always stay the same, and if you're using a vertical matching method stretching horizontally does not change anything and vice versa. The "Actual FOV" in the output will show you the FOV for your aspect ratio. For instance those who play CSGO with 4:3 stretched on a 1920x1080 monitor do like this: If you play with black bars, select this: If you're on an ultrawide monitor and there's a game that does not support 21:9 but maxes out at 16:9, do this: Likewise on a 16:10 monitor with a 16:9 game (so you have black bars on top and bottom): Focal length This is a function available in the Aspect Ratio box of the output game. What this does is calculate the correct resolution you need to set (with black bars) to keep the same focal length based on your FOV. This is useful for games that does not support FOV change. Monitor Enter the size of your monitor. This value is not used in the sensitivity calculation unless you enter different sizes and/or aspect ratios for the input and output game. If you do enter different values, the calculator will adjust for any differences in size and aspect ratio. 360 distance will be the same, as it doesn't change based on monitor size or aspect ratio. The horizontal matching methods will take into account the horizontal size of the monitor. The vertical matching methods will take into account the vertical size of the monitor. This means that if you go from a 24" to a 27" 16:9 monitor, both horizontal and vertical will give you the same result. However if you go from a 27" 16:9 to a 35" 21:9 the vertical sensitivity will stay about the same, while horizontal will account for the extra width. WPS WPS (Windows Pointer Speed) is the sensitivity setting for your mouse in Windows. The WPS value can be set in three different locations depending on the version of Windows you are using. In Settings: Go to Settings -> Bluetooth & devices -> Mouse -> Mouse pointer speed This slider has 20 steps (1-20), where 10 is the default value. The current value is shown when you move the slider. In Control Panel: Go to Control Panel -> Hardware and Sound -> Mouse -> Pointer Options -> Motion -> Select a pointer speed This slider has 11 steps (1-11), where 6 is the default value. These values are noted in parenthesis, where 6/11 is the default value. In Regedit: Go to HKEY_CURRENT_USER\Control Panel\Mouse\MouseSensitivity This method supports values from 1 to 20 If the game supports raw mouse input, this field will be disabled. With raw mouse input enabled, the sensitivity in Windows will not affect the sensitivity in the game. It is always recommended to enable raw mouse input if supported by the game. If the game does not support raw mouse input, the WPS field will be enabled, and you must set it to the correct value according to your settings in Windows. "Enhance pointer precision" must not be enabled if the game does not support raw mouse input. This option enables acceleration, which makes all calculations invalid. FOV and FOV Type Field of View (FOV) is an essential aspect of sensitivity calculations, as it can directly impact the 360 distance, and because Monitor Distance, Viewspeed, and Jedi's Trick calculations are all based on FOV. These fields can also be used as a conversion tool. FOV can be expressed in various ways, which is where the FOV Type field comes in. This field automatically updates to the correct FOV Type for the game you select, and the default FOV will be used as a placeholder value. It's crucial to ensure that you change the FOV value if you've modified it in the game, as this can have a significant impact on the accuracy of the calculations. It's essential to note that the different FOV Types are not associated with your aspect ratio; rather, they indicate how the game calculates FOV. The different FOV Types are: Hdeg 4:3 - Horizontal Degrees based on 4:3 aspect ratio. Hdeg 16:9 - Horizontal Degrees based on 16:9 aspect ratio. Hdeg Res - Horizontal Degrees based on your configured resolution and aspect ratio. Vdeg - Vertical Degrees. Hrad 4:3 - Horizontal Radians based on 4:3 aspect ratio. Hrad 16:9 - Horizontal Radians based on 16:9 aspect ratio. Hrad Res - Horizontal Radians based on your configured resolution and aspect ratio. Vrad - Vertical Radians Multiplier - Various multipliers that does not directly indicate the FOV. The following explanations will only cover degrees, as the concept is exactly the same for radians. Radians are just another way of expressing angles, where 1 degree = π/180 radians. Hdeg 4:3 - Horizontal Degrees based on 4:3 aspect ratio This is commonly used by older games that pre-dates 16:9 monitors being common, like Counter-Strike: Global Offensive (CSGO) and older Call of Duty games. Some newer games also use this since so many gamers are used to it from CSGO etc. The way this works is that the FOV value you configure is only true for the 4:3 portion of the monitor. If you use a different aspect ratio, the extra width will be added on making the FOV effectively wider, while the 4:3 portion stays the same. In the example under the FOV in CSGO is configured to 90, which means it will be 106.26 in 16:9: Hdeg 16:9 - Horizontal Degrees based on 16:9 aspect ratio This is used by a lot of newer games, and works exactly like Hdeg 4:3, except the value you configure is for the 16:9 portion of the monitor. As the image under shows, when Quake Champions is configured with an FOV of 120, it will be extended to 133.17 for 21:9. Hdeg Res - Horizontal Degrees based on your configured resolution and aspect ratio This method locks the horizontal FOV to the configured value, regardless of aspect ratio. So in Terminator Resistance, setting the FOV to e.g. 95 means the horizontal FOV will be 95 for all aspects ratios, while the vertical FOV changes: Vdeg - Vertical Degrees By locking the vertical FOV to a specific value, this method will adjust the horizontal FOV based on your aspect ratio. So in Battlefield V with the FOV configured to 55, this will be the horizontal FOV in 16:9 and 21:9: Multiplier Some games use a FOV value that does not directly indicate the actual FOV. This can be as straight forward as: 1 = 90 Hdeg Res and 1.1 = 99 Hdeg Res etc 0 = 43 Vdeg and 10 = 53 Vdeg etc But other games use multipliers that are a lot more complex, like for instance calculating the FOV differently depending on your aspect ratio. When you select a game that uses a multiplier, the FOV Type will switch to "Multiplier" and you can enter the multiplier value. The calculator will calculate your actual FOV in the output. Converting FOV When you switch FOV Types, the FOV value will automatically be re-calculated (based on your resolution input), and rounding, minimum and maximum values of the default FOV Type applied, to keep the actual FOV as close as possible within the limitations of the game. This way you can check what the FOV is in the different types. It is recommended to always use the same FOV for your games whenever possible. Some games do not allow you to change FOV, but when you can you should match them. The way you do this is to find one specific FOV you like (you can not use a multiplier for this), let's for instance say CSGO's default FOV of 90 Hdeg 4:3. When you want to convert this FOV to other games, simply select Hdeg 4:3 and enter 90 for the game, and check the output for the Config FOV. This is what you need to configure in the game to get the same FOV. Location Select the location for your sensitivity. This is typically in-game or config file, but can also be regedit, console, memory editor or save files requiring third party tools. The location in Default or Advanced mode will default to config file when available, as this is the most accurate place to set the sensitivity. For Simple mode the default is in-game when available, as this is the easiest place to set the sensitivity. Sensitivity might be completely different depending on the location, so it's very important to select the correct one. Swap Located between the "Convert to" and "Convert from" sections, there's a swap button represented by two opposing arrows. Clicking this button will reverse the calculation, making the "Convert from" game the "Convert to" game, and vice versa. The calculated sensitivity for the previous "Convert to" game will be automatically filled in, while keeping all other values intact. Clear Input The "Clear input" text button will clear everything entered for either the "Convert from" or "Convert to" sections.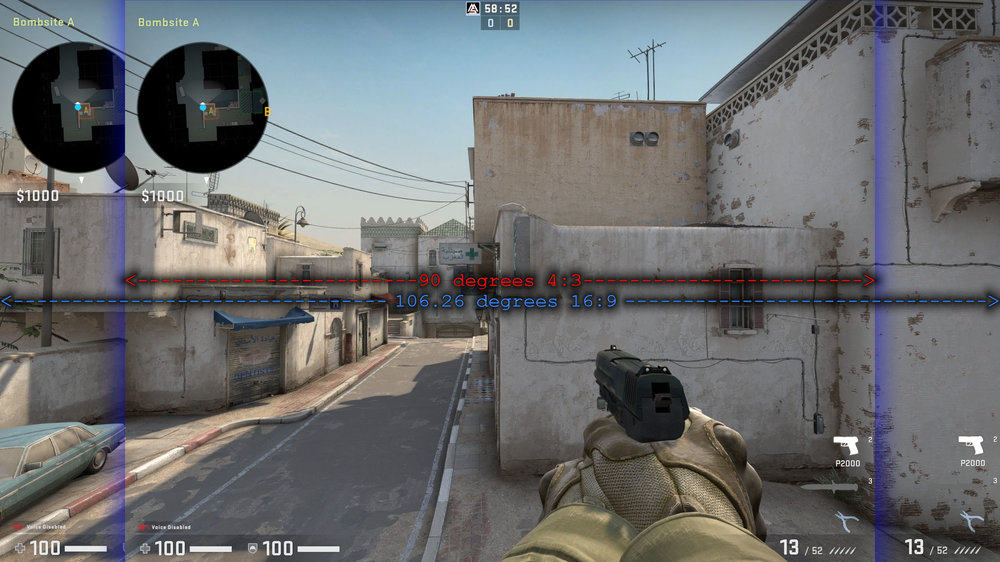


 1 point